How to make... a super cute summer dress!

Well guys, now that summer actually feels like summer (Hello 30°C! We missed you!), we felt this was the perfect moment to show you how to make this super cute summer dress for your dolls. With a low-cut back and a fun knee-length circle skirt, it's all your doll needs for those tropical temperatures! 

Wow, that looks just stunning!

This is another adaption of our all-time classic, the Peggy-outfit. We updated it a bit by using a smaller circle as skirt, which makes it shorter, and giving it a low-cut back without the knots at the back of the neck. 

We used the Pastel fabric set, which you can buy here.

You'll need to cut the 4 following pieces from the fabric of your choice (easiest is if you use a paper Peggy-pattern!). They should be shaped like this (don't copy this picture, it's just a sketch and not an accurate pattern). 


Make sure to do your math here if you draw the pattern from scratch! You see the blue dotted circular line on the skirt? That's the circumference. It should be the same as the waist of your doll. Say for example it measures 8 cm or 3 inches. That means that the length of the blue dotted line on the front piece (top left!) should measure 4 cm or 1.5 inches, and the blue dotted line on each back piece about half that. 


Now sew, with the colors on the inside, the colored dotted lines to eachother (green to green, orange to orange, and so on!). 


Turn the skirt inside out, so the color is on the inside. The shirt should have its color on the outside.


Turn the shirt upside down, and put it with the bottom first inside the skirt, so it sticks out of the top. And still, the skirt should be inside out, but not the shirt!


Now, sew the bottom of the shirt to the top of the skirt. Leave about 1cm from the top. Make sure to make a knot at the end by sewing a few stitches on top of each other!


Turn the dress over, and there you have it: a super cute summer dress for your doll!


That's all there is to it! As a finishing touch, cut out a strip of fabric and tie it around her waist, with a pretty bow on her back!  


How to make... a retro floral dress!

What do you call a blog that offers you inspirational sewing tips, beautiful fashion posts and fun DIY projects… all fit to a doll’s size? Well, the DressYourDoll blog of course! 

We as the DressYourDoll team feel like we want to connect more with our fans. We want to take our creativity, and yours, to the next level. Here on our blog, we will regularly post new content providing you with exclusive materials, tips, tricks and inspiration to get sewing and crafting for your dolls. There will be both entry level stuff and advanced, crafting tips for accessories, a cute retro outfit or funky 80’s style! Providing clear instructions for all outfits and crafting projects, we get you started or help you advance. You can ask us any question you want, through the ask box, via our Facebook page, or send us an e-mail! There’s so much we haven’t explored yet! And next to all that new content, keep your eye open the next few weeks for a BIG surprise…

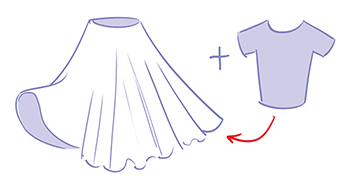
For our first blog post, we thought we’d start of with a beautiful summer dress. This was made with one of our new floral fabric sets from the 2014 collection, a very inspiring light blue fabric with pinkish-red roses. The dress is as gorgeous as it is easy!

As you can see, this is a variation on our Peggy-outfit. We simply attached a shirt of the Tiny model to the skirt of the Peggy, so it has short sleeves and a closed backside. We didn’t cut into the neckline as we would with a Tiny shirt, but simply made the neckline a bit wider to the shoulders. Just put your doll feet first through the neckline to try it on! For a finishing touch, cut out a thin strap from a matching fabric and tie it around her waist!

You will need the shirt pattern of a Tiny-outfit and the circular skirt of a Peggy-outfit for this, and we used fabrics from the Red Roses fabric set, which you can buy here

1 - Cut out both patterns from the paper, then transfer them onto the fabric. It’s easiest if you draw on the backside of the fabric! Then you also cut out these parts.
2 - Adapt the neckline of the Tiny shirt so it’s a bit wider.
3 - Sew the two seams of the Tiny shirt, but keep the colors on the inside! When you have finished sewing, turn the shirt inside out. 

You’re already halfway! Now you have to sew the skirt to the shirt, which may be a bit difficult if you’ve never done that before! That’s why we’ve made a series of drawings to help you along:

4 - Turn the skirt inside out, so the color is on the inside. The shirt should have its color on the outside.


5 - Turn the shirt upside down, and put it with the bottom first inside the skirt, so it sticks out of the top. And still, the skirt should be inside out, but not the shirt!


6- Now, sew the bottom of the shirt to the top of the skirt. Leave about 1cm from the top. Make sure to make a knot at the end by sewing a few stitches on top of each other!


7- Turn the dress over, and there you have it: a beautiful retro dress for your doll! 


To top it off, you can tie a little strap around her waist. 

Well, what do you think… are you inspired? Because we sure are. We have a lot of great stuff lined up for you to see, so keep us in mind!